
Why Solar Panel Isn't Charging Your Battery? Troubleshooting Guide
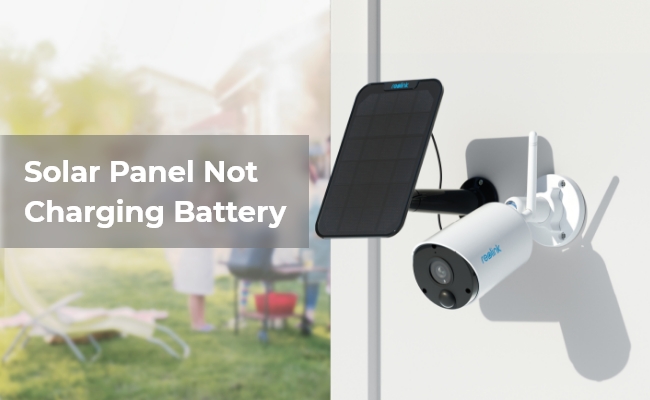
Is your solar panel not charging your battery? The most common causes include insufficient sunlight, dirty panels, loose connections, battery issues, and incorrect setup.
A solar charging setup that stops working can leave your security cameras, RV, or outdoor lighting completely unpowered. Before replacing expensive hardware, follow this step-by-step troubleshooting guide to test your connections, verify voltage levels, and fix common solar panel charging issues quickly.
- Why Is My Solar Panel Not Charging My Battery?
- How to Troubleshoot a Solar Panel Not Charging Your Battery
- Quick Solar Charging Troubleshooting Checklist
- Why Is My Reolink Solar Panel Not Charging?
- Recommended Solutions: High-Efficiency Solar Panels & Battery Cameras
- Bonus Tips: How To Check If Solar Panel Is Charging Battery?
- FAQs
- Conclusion
Why Is My Solar Panel Not Charging My Battery?
A solar panel that fails to charge a battery usually suffers from poor sunlight exposure, loose wiring, improper charge controller settings, extreme cold temperatures, or an aged battery that can no longer hold a charge.
Understanding the root cause helps you diagnose the issue quickly without replacing working equipment:
1. Insufficient Direct Sunlight & Panel Shading
Solar panels require direct, unshaded sunlight to output sufficient voltage; even minor partial shading can drop output below the threshold needed to initiate a charge cycle.
-
Improper Tilt & Direction: Mounting panels flat or pointing them away from optimal sunlight angles (e.g., facing North in the Northern Hemisphere) significantly drops power production.
-
Partial Shading Obstructions: Shadows cast by tree branches, roof eaves, or accumulated dust, pollen, and snow create high internal resistance across solar cells, reducing total voltage output.
2. Faulty Wiring, Loose Terminals, or Reverse Polarity
Loose or corroded wire connections create high electrical resistance, while swapped positive/negative leads activate built-in protection fuses that halt power transfer.
-
Corrosion and Loose Screws: Vibration, weather exposure, and temperature changes can loosen terminal screws on the controller or battery terminals, cutting current flow.
-
Reverse Polarity Mix-Ups: Accidental swapping of positive ($+$) and negative ($-$) leads triggers safety mechanisms in modern solar charge controllers, preventing the system from delivering power.
3. Extremely Cold Temperatures
Most modern lithium (LiFePO4) batteries feature a Battery Management System (BMS) that automatically stops charging when the internal temperature drops below 32°F (0°C) to protect the battery cells from permanent damage.
-
Low-Temperature Cutoff: While lithium batteries can discharge in freezing weather, charging them sub-zero causes "lithium plating," which short-circuits internal cells. The BMS safely halts charging until the core temperature rises above freezing.
-
High Internal Resistance: Sub-zero temperatures increase resistance inside lead-acid and lithium batteries alike, making it difficult for standard solar voltages to force current into the battery.
4. Overcharge, Overload, or Full Battery State
Charge controllers routinely halt or taper power transfer when the battery reaches 100% capacity or when safety parameters are triggered.
-
Battery at Full Capacity: If a battery is already above 90%–95% charge, the controller automatically switches to a low "float" mode or shuts off charging completely to protect battery lifespan.
-
Blown Fuses / Safety Tripping: A sudden power surge or overload can trip an inline breaker or blow a internal fuse in the charge controller, disconnecting the solar panel input.
5. Incompatible Equipment or Incorrect Controller Configuration
Using a charge controller with incorrect voltage settings or mismatching panel and battery operating ranges prevents the system from regulating power efficiently.
-
Voltage Mismatch: Attempting to charge a 24V battery bank with a single 12V solar panel yields insufficient voltage to push current into the cells.
-
Incorrect Profile Settings: If an MPPT/PWM controller is set to "Lead-Acid" mode while connected to a "Lithium" battery, its cutoff threshold will be improperly calibrated, preventing a full charge cycle.
6. Battery Health Degradation or Deep Discharge
A severely degraded battery—or one that has discharged far below its safe voltage floor—cannot register on the charge controller to start charging.
-
Dead Battery Cutoff: Many digital solar charge controllers need at least 8V to 10V of residual battery power just to turn on their internal electronics. If a battery is drained completely to 0V, the controller will fail to recognize it.
-
Internal Cell Failure: Sulfated lead-acid batteries or heavily aged lithium cells develop high internal resistance and can no longer hold chemical energy, regardless of how much solar voltage is supplied.
How to Troubleshoot a Solar Panel Not Charging Your Battery
To troubleshoot a solar panel that isn't charging your battery, systematically inspect physical connections, test open-circuit panel voltage with a multimeter, check BMS/thermal cutoff parameters, and verify controller settings.
Follow these troubleshooting steps to identify the precise fault and restore your power system:
Step 1. Perform a Visual Check & Clear Sunlight Obstructions
Ensure solar panels are unshaded, clean, and angled properly toward direct sunlight.
-
Inspect the Surface: Clean away accumulated dirt, leaves, bird droppings, or snow that block light absorption.
-
Check for Partial Shading: Verify that tree branches, roof eaves, or nearby structures aren't casting shadows across the panel cells. Even partial shade on a single cell significantly drops overall string output.
-
Optimize Tilt Angle: Adjust panel orientation toward the sun (South-facing in the Northern Hemisphere) at an angle roughly equal to your local latitude to maximize solar intake.
Step 2. Inspect, Tighten, and Test All Wiring Connections
Eliminate high electrical resistance by fixing loose, corroded, or incorrectly wired terminals.
-
Check Screw Terminals: Inspect the wiring terminals on your charge controller and battery posts. Tighten any loose screws caused by temperature expansion or vibrations.
-
Clean Corrosion: Scrub off any green or white oxidation buildup on battery terminals using a wire brush and baking soda solution.
-
Verify Polarity: Ensure positive ($+$) leads connect to positive terminals and negative ($-$) to negative. Swapped leads trip protective internal fuses.
Step 3. Test Solar Panel Voltage with a Multimeter
Disconnect the panel from the system and measure its Open-Circuit Voltage to confirm whether the panel itself is functional.
-
Measure voltage: Set a multimeter to DC Voltage. Disconnect the solar panel leads from the controller and place the multimeter probes directly on the panel’s positive and negative wires while in full sunlight.
-
Compare to Specifications: Match your reading to the voltage rating listed on the panel's rear spec label. If the reading is near zero under full sun, the solar panel or its internal junction diode is defective and needs replacement.
Step 4. Reset the Charge Controller & Check BMS Safety Cutoffs
Clear controller protection states and verify if low temperatures or full charge states are temporarily pausing the charge cycle.
-
Check Temperature Limits: If using a lithium (LiFePO4) battery in cold weather, verify whether ambient temperatures have dropped below 0°C. The Battery Management System (BMS) will automatically block charging to prevent battery damage until warm.
-
Disconnect Loads: Remove heavy electrical loads connected to the battery or controller load terminals to prevent overload tripping.
-
Perform a Soft Power Reset: Disconnect the solar panel wires first, then disconnect the battery from the controller. Wait 2 minutes, then reconnect the battery first (so the controller detects system voltage), followed by the solar panel leads.
Step 5. Verify Component Compatibility & Controller Profile Settings
Confirm that your solar controller is programmed for your specific battery chemistry and voltage.
-
Check Chemistry Profiles: Access your charge controller settings (via LCD screen or Bluetooth app) and ensure the profile matches your battery type (e.g., Lithium/LiFePO4 vs. AGM/Sealed Lead-Acid).
-
Verify Voltage Thresholds: Ensure panel operating voltage exceeds battery voltage. A single 12V panel cannot supply enough voltage to charge a 24V battery bank.
Step 6. Test Battery Health & Jump-Start Drained Batteries
Severely drained or aged batteries cannot trigger the charge controller to initiate charging.
-
Measure Resting Voltage: Use a multimeter on the disconnected battery terminals. A healthy 12V lead-acid battery should read above 12.2V, while a 12V lithium battery should read above 13.0V.
-
Wake Up Drained Batteries: If a battery drops below 8V-10V, the charge controller may not turn on. Use an AC-powered bench charger or a jump-starter with a "0V/Force Charge" recovery feature to jump-start the battery back into a recognizable voltage range.
-
Replace Degraded Batteries: If a battery fails to hold a charge after a full cycle or displays internal resistance faults, replace it.
Quick Solar Charging Troubleshooting Checklist
Why Is My Reolink Solar Panel Not Charging?
A Reolink solar panel that isn't charging your camera is usually caused by an unstable micro-USB/Type-C connection, ambient temperatures dropping below $0^\circ\text{C}$ ($32^\circ\text{F}$), partial shading, or a deeply drained battery that requires a initial wall-adapter jumpstart.
Follow these step-by-step checks to diagnose the connection and restore charging to your Reolink battery camera:
1. Verify Cable Connection and Reolink App Status Icons
Ensure the panel's micro-USB or USB-C plug is fully seated and sealed into the camera's charging port, then check the app icon.
-
Check the Waterproof Seal: Unplug the charging cable, clean away any dirt or moisture around the rubber gasket, and re-insert the connector firmly.
-
Look for the "Sun" Icon: Open the Reolink App and check the battery status indicator. A Sun Icon next to the battery means the camera properly recognizes the solar panel. If a Plug Icon or standard battery appears without a lightning bolt, the camera is not detecting the panel's charge.
-
Test the Connector Cable: Inspect the cable for bends or physical wear. If the cable feels loose in the charging port, test the camera with a standard 5V USB cable to rule out a damaged connector.
2. Confirm Charging Temperature Protection Limits
Reolink cameras automatically pause solar charging in freezing weather to protect the internal lithium-ion battery.
-
Sub-Zero Thermal Cutoff: Standard Reolink lithium batteries will not charge when the ambient temperature drops below 32°F (0°C).
-
Normal Protection Behavior: If the camera is operating in sub-zero winter temperatures, the solar panel is functioning normally by withholding charge. Solar charging will automatically resume once local temperatures rise back above freezing.
3. Clear Shading and Optimize Panel Angle
Solar panels require unshaded, direct sunlight; indirect sky light or partial shadows significantly drop current output.
-
Remove Micro-Shading: Tree branches, glass window reflection, roof eaves, or accumulated pollen and dirt reduce panel efficiency. Wipe the panel face clean with a micro-fiber cloth.
-
Adjust Facing Direction: Angle the panel toward True South (in the Northern Hemisphere) at a 30°–45° tilt to maximize direct solar absorption throughout the afternoon.
4. Perform a 5V/2A Adapter "Wake-Up" Test
A battery drained to 0% cannot trigger the camera's internal charging circuit via solar power alone.
-
Initial Wall Charge: If the camera battery has completely drained, bring the camera indoors and charge it with a 5V/2A DC power adapter until the battery level reaches at least 50%.
-
Reconnect Solar Panel: Re-mount the camera outside, connect the solar panel securely, and monitor the Reolink App under direct sunlight to ensure the charging icon appears.
Recommended Solutions: High-Efficiency Solar Panels & Battery Cameras
If troubleshooting reveals that your existing solar panel is defective, underpowered, or unable to keep up with high winter energy demands, upgrading to a higher-wattage, weather-resistant solar setup ensures reliable 24/7 power without manual battery recharges.
When choosing a replacement solar charger, look for:
-
Higher Wattage Output (6W+): Standard 3W panels often struggle in cloudy or winter conditions. A 6W+ panel generates more current during short daylight hours.
-
Adjustable 360° Mounting Bracket: Allows precise angling toward seasonal sun positions.
-
IP65/IP66 Weatherproofing: Ensures rubber gaskets and charging ports prevent rain and melted snow from seeping in.
Top Recommendation: Reolink Solar Panel 2 (6W High-Efficiency)
An upgraded 6W solar panel designed to charge Reolink battery-powered cameras twice as fast—even in overcast conditions or short winter days.
Best For: Users dealing with high camera activity, cold winter climates, or partial shading issues.
Standard solar panels can drop below the minimum charging voltage in low-light environments. The Reolink Solar Panel 2 delivers up to 6W of continuous power output, allowing it to initiate battery charging even under weak ambient sunlight.
Equipped with a 4-meter connection cable and a fully sealed, IP65-rated USB-C connector to keep moisture out of the camera's charging port.
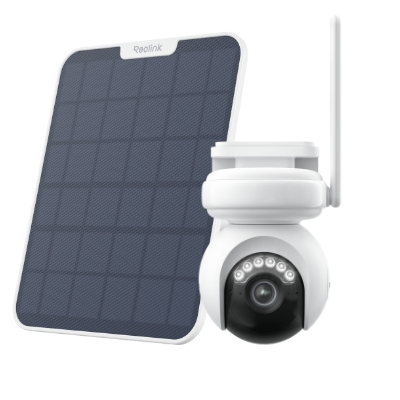
4K Battery-Powered PTZ Camera with Continuous Recording
👍 4K UHD video with continuous recording
👍 ColorX night vision in low light
👍 Pan, tilt, and automatic person tracking
👍 Local storage without monthly fees
Pro Tip: If your camera is mounted in a deeply shaded spot (such as under a roof eave), use the included 4-meter extension cable to mount the solar panel higher up on a sunny wall or roofline.
Bonus Tips: How To Check If Solar Panel Is Charging Battery?
To check whether your solar panel is charging your battery, you can use these simple methods:
-
Check the battery level: Connect the battery to the solar panel and place the panel under direct sunlight. After some time, check whether the battery level increases.
-
Use a multimeter: Measure the solar panel output voltage by connecting the multimeter probes to the panel terminals. Compare the reading with the panel’s rated output to confirm it is generating power.
-
Check the charge controller indicators: If your system uses a charge controller, review its charging status lights or display to confirm whether power is flowing from the solar panel to the battery.
If your solar panel not charging battery issue continues, check common causes such as insufficient sunlight, dirty panels, loose connections, or battery problems.
FAQs
How to test if a solar panel is charging a battery?
Check the battery voltage before and after connecting the solar panel. You can also use a multimeter to measure the panel’s output voltage or check the charge controller indicator for charging status.
How to reset a solar panel charger?
Disconnect the solar panel and battery from the charge controller, wait a few minutes, then reconnect the battery first followed by the solar panel. Check if the charger resumes normal operation.
How to reset a solar panel battery?
Disconnect the battery from the solar system, wait briefly, then reconnect it securely. If the battery has a Battery Management System (BMS), it may automatically reset after protection conditions are cleared.
How to tell if a solar panel is faulty?
A faulty solar panel may show zero or unusually low voltage, visible damage, or reduced charging performance even under direct sunlight. Use a multimeter to compare the output with the panel’s rated voltage.
Conclusion
Understanding why solar panels are not charging your battery will be crucial to maintaining the functionality of your electronics, such as security cameras and outdoor lights. There could be multiple reasons why your solar panels are not charging the battery. We hope that the troubleshooting steps and tips in this guide have helped you obtain optimal performance from your solar panels once again.
Search
Subscribe for the Latest Updates
Security insights & offers right into your inbox