
HomeKit on Android: Everything You Need to Know
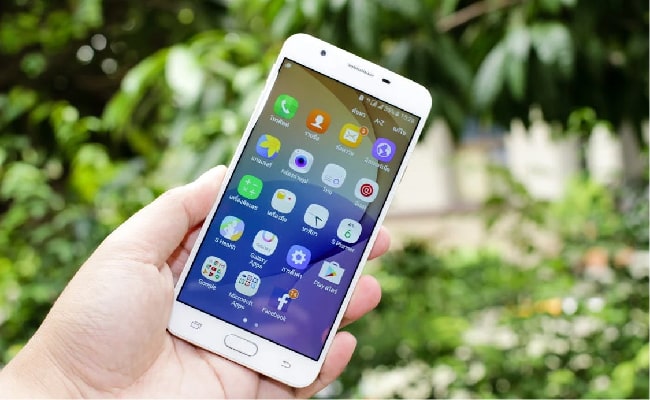
While Apple does not offer a native Apple Home app for Android, you can easily control HomeKit devices on Android using open-source bridges like Home Assistant and Homebridge, or by leveraging universal Matter smart home standards. In this guide, you will learn everything about using HomeKit for Android gadgets.
Is HomeKit Compatible with Android?
Apple HomeKit is not natively compatible with Android devices out of the box. Because HomeKit is a proprietary Apple ecosystem, controlling it natively requires an iOS device (iPhone, iPad, or Mac).
However, you can achieve HomeKit on Android functionality by using bridge platforms that translate signals between Apple’s framework and Android-friendly interfaces:
-
Home Assistant: Integrates all your smart devices and exposes HomeKit accessories to a custom Android app.
-
Homebridge: Emulates the Apple HomeKit API to make non-HomeKit devices visible across platforms.
-
Matter Smart Home Standard: Allows multi-admin control so an accessory can pair with both the Apple Home app and Google Home on Android simultaneously.
How to Connect HomeKit to Android via Home Assistant
Image this: You are an Android user living in a mixed-tech household, or you want to purchase a HomeKit-exclusive device (like an Apple HomeKit light strip or smart lock) without buying an iPhone.
By setting up Home Assistant as a local smart home server, you can pair HomeKit-only accessories directly to your hub using the HomeKit Device integration. Home Assistant translates Apple's protocol locally, giving you full control over your HomeKit devices through the native Home Assistant Android Companion App.
Unpair your HomeKit accessory from iOS, add it to Home Assistant using its HomeKit pairing code, and control it from your Android device via the Home Assistant app.
Step 1: Deploy Home Assistant on Your Local Network
Set up a local home automation server to act as the central hub for your smart devices.
-
Install Home Assistant Operating System on a low-power device like a Raspberry Pi 4/5 or a dedicated home server connected to your Wi-Fi router.
-
Complete the initial setup wizard on your web browser to create your local admin account.
Step 2: Unpair Your Accessory from Apple Home (If Previously Set Up)
Reset your HomeKit device so Home Assistant can discover it over your local network.
-
A HomeKit device can only be paired to one primary controller at a time.
-
If the accessory was previously connected to an iOS device, open the Apple Home app and remove the accessory, or perform a factory reset on the hardware.
Step 3: Pair the HomeKit Device to Home Assistant
Use Home Assistant’s HomeKit Device integration to discover and control the accessory.
-
Open your Home Assistant dashboard, navigate to Settings > Devices & Services, and click Add Integration.
-
Search for HomeKit Device (formerly HomeKit Controller).
-
Ensure your accessory is powered on. Home Assistant will auto-discover it over Wi-Fi or Bluetooth.
-
Enter the 8-digit HomeKit pairing code (found on the device packaging or hardware label) to complete the integration.
Step 4: Install the Home Assistant Android App
Access your newly added HomeKit accessories directly from your Android phone or tablet.
-
Download the official Home Assistant Companion App from the Google Play Store on your Android phone.
-
Open the app, let it detect your local Home Assistant instance, and log in.
Step 5: Customize Android Widgets & Voice Control
Set up fast controls, home screen widgets, and Google Assistant triggers for your HomeKit accessories.
-
Control Dashboards: Add your HomeKit lights, thermostats, or security sensors to your main mobile dashboard.
-
Home Screen Widgets: Create quick-toggle widgets on your Android home screen to control your HomeKit devices with a single tap.
-
Automations: Create local automations in Home Assistant so your HomeKit accessories automatically respond to your Android phone's location, battery level, or connection to home Wi-Fi.
How to Set Up Android HomeKit Integration via Homebridge
You prefer a lightweight, set-it-and-forget-it bridge specifically designed to make non-HomeKit devices (like Nest thermostats, Ring doorbells, or TP-Link plugs) compatible with Apple Home, without needing a complex full-scale smart home server.
Homebridge acts as a lightweight emulator that translates non-HomeKit device protocols into Apple's HomeKit framework. By accessing the web-based Homebridge UI or third-party management apps on your Android phone, you can monitor hardware status, manage plugins, and trigger accessories remotely across your network.
Key Difference: Homebridge vs. Home Assistant: While both platforms bridge smart home hardware, they serve different primary purposes:
- Home Assistant: A full-featured, open-source home automation platform with its own native Android app. It acts as an all-in-one smart home hub that can both receive and broadcast HomeKit signals.
- Homebridge: A lightweight node.js server focused specifically on bridging non-supported accessories into the HomeKit API. It requires fewer system resources than Home Assistant and uses a built-in web browser UI for mobile device control.
Install Homebridge on a local server, configure plugins for your smart devices, and control your setup from your Android phone using the web-based Homebridge UI dashboard or third-party controller apps.
Step 1: Install Homebridge on Your Local Server
Set up the lightweight Homebridge server on a Raspberry Pi, NAS, or home computer.
-
Flash the official Homebridge image onto a Raspberry Pi or install Homebridge via Docker/Node.js on an always-on desktop computer connected to your home Wi-Fi.
-
Access the web management dashboard via your browser at http://homebridge.local:8581.
Step 2: Install Plugins for Your Smart Accessories
Search and add community plugins to link non-HomeKit devices to your bridge.
-
Navigate to the Plugins tab in the Homebridge web UI.
-
Search for your specific device brands (e.g.,
homebridge-nest,homebridge-ring, orhomebridge-tplink-smarthome) and click Install. -
Follow the on-screen configuration prompts to log into your device accounts or enter local IP addresses.
Step 3: Add Devices to Your Config File & Verify Accessories
Map your hardware so it generates valid HomeKit accessory data on your network.
-
Use the visual config editor in the Homebridge UI to adjust device parameters (such as motion sensitivity, temperature limits, or custom accessory names).
-
Restart the Homebridge server instance to load your newly configured accessories.
Step 4: Access Homebridge Controls on Your Android Device
Use the mobile-optimized Homebridge web UI or an Android management app to control devices.
-
Web UI Dashboard (Recommended): Open Chrome or Firefox on your Android device, navigate to your server's IP address (
http://), and save the page to your Android home screen as a Web App (PWA). -
Third-Party Android Apps: Alternatively, download a Homebridge controller app from the Google Play Store (such as Bridge Control for Homebridge) to monitor bridge status, toggle switches, and view device logs directly from your phone.
Step 5: Automate Cross-Platform Control with Google Assistant (Optional)
Link your bridged devices to Google Home for voice control on Android.
-
To enable native voice control via "Hey Google," install the
homebridge-gsh(Google Smart Home) plugin. -
Link your Homebridge account inside the Google Home Android app. Your Homebridge-connected accessories will now respond to Google Assistant voice commands on your Android phone or tablet!
How to Use Matter for Cross-Platform Control (Apple Home + Android)
Your household is split between iPhone and Android users. One family member wants to control smart home devices (plugs, lights, locks, or thermostats) using Siri on their iPad or iPhone, while another wants to use Google Assistant or the Google Home app on their Android phone.
Instead of setting up complex DIY bridge servers (like Homebridge or Home Assistant), you can buy Matter-certified smart home accessories. Matter's Multi-Admin feature allows a single hardware device to pair natively with both Apple Home and Google Home at the same time, giving everyone full control regardless of their smartphone brand.
Preparation for Dual-Platform Matter Control
To share a Matter device between Apple Home and Google Home, make sure you have:
-
Two Smart Home Hubs: An Apple Matter Hub (e.g., Apple TV 4K or HomePod) and a Google Matter Hub (e.g., Nest Hub 2nd Gen, Nest Audio, or Google TV Streamer).
-
Same Network: Both hubs and your smartphone must be on the same local Wi-Fi network (2.4 GHz recommended for setup).
Pair the Matter device to Apple Home on iOS first, generate a temporary Multi-Admin pairing code, and enter that code into Google Home on Android.
Step 1: Pair the Matter Device to Apple Home
Complete the initial device setup on your iOS device to add it to your local Matter fabric.
-
Ensure your iPhone or iPad is connected to your home Wi-Fi network with Bluetooth turned on.
-
Open the Apple Home app, tap the + (Add) button, and select Add Accessory.
-
Scan the Matter QR code on the packaging or hardware label and assign the device to a room.
Step 2: Generate a Multi-Admin Setup Code in Apple Home
Create a temporary 11-digit pairing code to share controller access with your Android device.
-
Open the Apple Home app and long-press the device tile you just added.
-
Tap the gear icon (Settings) in the bottom right corner, scroll down, and tap Turn On Pairing Mode.
-
Apple Home will display a temporary QR Code and an 11-digit numeric pairing code. Tap Copy Code (Note: This setup code remains active for 3 to 15 minutes depending on device firmware).
Step 3: Add the Accessory to Google Home on Android
nput the temporary pairing code into the Google Home app on Android to link the second controller.
-
Open the Google Home app on your Android device.
-
Tap Devices > + Add > Matter-enabled device.
-
When prompted to scan a QR code, tap Set up without QR code or Use pairing code.
-
Paste or manually enter the 11-digit numeric code copied from Apple Home and select your home profile.
Step 3: Complete Room Assignment & Dual-Platform Control
Confirm the connection to enjoy simultaneous voice and app control across both ecosystems.
-
Follow the on-screen prompts in Google Home to name your accessory and assign it to a room.
-
Dual-Platform Freedom: The device is now active on both networks simultaneously! iOS users can use Siri or the Apple Home app, while Android users can control the exact same device via Google Assistant, Android home screen widgets, or the Google Home app.
Summary: Top Apps & Interfaces to Control HomeKit Devices on Android
While official iOS apps like Controller for HomeKit or Eve do not run on Android, these are the best native Android alternatives for controlling a bridged setup:
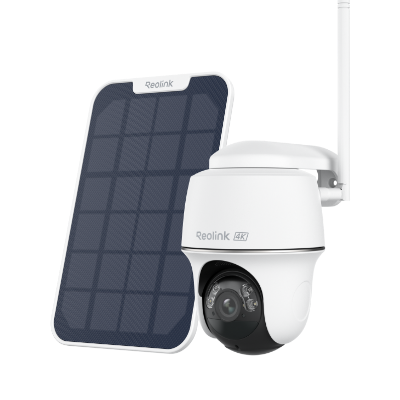
Security Camera Tip: If you want seamless multi-platform video surveillance without complex bridging, select cameras with native multi-app support. For example, the Reolink Argus PT Ultra (4K 8MP solar/battery camera) streams directly to both Android and iOS devices via the free Reolink App without requiring monthly subscription fees.
4k 100% Wire-Free PT Camera
4K 8MP Ultra HD; 5GHz/2.4GHz WiFi; Rechargeable Battery & Solar Powered; 355° Pan & 140° Tilt; IP65 Certified Weatherproof; Clear Night Vision; 2-Way Audio; 122° Wide Viewing Angle.
FAQs
Does HomeKit work on Android?
HomeKit does not natively work on Android, but you can integrate HomeKit compatibility through platforms like Home Assistant and Homebridge. These act as bridges between HomeKit and your other smart home devices. So, with the proper setup, you can use HomeKit with an Android phone or tablet.
Can I run Homebridge on Android?
Unfortunately, Homebridge does not currently run directly on Android. It needs to be installed on a device like a Raspberry Pi. However, you can then use an Android device to remotely access Homebridge and control your HomeKit accessories.
Is HomeKit only for Apple devices?
HomeKit was created by Apple for Apple devices like iPhones, iPads, Macs, etc. However, Home Assistant and Homebridge allow HomeKit to work with non-Apple devices like Android phones. So, HomeKit is not limited only to Apple devices, even though that is its native support.
Conclusion
Although HomeKit is designed specifically for the Apple ecosystem, Android users can still use its capabilities through platforms such as Home Assistant and Homebridge. These bridges integrate HomeKit, so you can use your Android devices (phones or tablets) to control HomeKit accessories.
To set them up, you must follow some technical steps, like installing Home Assistant or Homebridge on one of your devices at home. Do you want to use HomeKit with Android devices? Is it necessary? Share your thoughts with us in the comment section below! Let's discuss!
Search
Subscribe for the Latest Updates
Security insights & offers right into your inbox